
Car tinting enhances vehicle aesthetics‚ reduces UV exposure‚ and improves privacy. It involves applying a thin film to windows‚ offering protection from sunlight and adding style to cars.
What is Car Tinting?
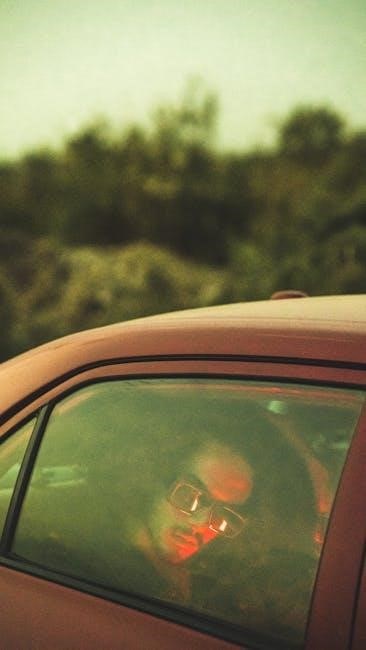
Car tinting is the process of applying a thin‚ protective film to vehicle windows. This film reduces UV rays‚ heat‚ and glare‚ enhancing comfort and privacy. It also improves aesthetics by giving windows a sleek‚ uniform appearance. Tinting can be done on side windows‚ rear windshields‚ and even front windshields‚ depending on local regulations. The film is available in various shades‚ from light to dark‚ and types such as dyed‚ metallized‚ or ceramic‚ each offering unique benefits like heat rejection and glare reduction. Proper installation ensures durability and optimal performance.
Benefits of Car Tinting
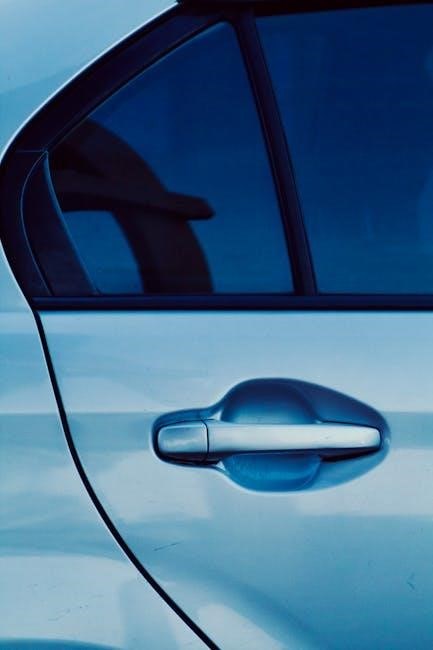
Car tinting offers numerous benefits‚ including reduced UV ray exposure‚ which protects passengers’ skin and prevents interior fading. It also minimizes heat buildup inside the vehicle‚ enhancing comfort during hot days. Tinting reduces glare from sunlight or headlights‚ improving visibility and safety while driving. Additionally‚ it provides privacy by making it harder for outsiders to see inside the car. The film also holds shattered glass together in case of accidents‚ adding a layer of safety. Overall‚ car tinting is a practical and stylish upgrade that enhances driving comfort and vehicle protection.

Types of Car Window Tint
Car window tints come in various types‚ including dyed‚ metallized‚ and ceramic options. Each offers unique benefits‚ such as UV protection‚ heat reduction‚ and enhanced privacy.
Dyed Window Tint
Dyed window tint is a popular choice for its affordability and sleek appearance. It is made by dyeing the inner layer of the tint film‚ which absorbs sunlight and reduces heat. This type of tint offers UV protection and enhances privacy. It is easy to install and comes in various shades‚ from light to dark. Dyed tint is a cost-effective option for drivers seeking style and functionality without breaking the bank. However‚ it may fade over time and doesn’t offer the same level of heat rejection as metallized or ceramic tints.
Metallized Window Tint
Metallized window tint features metallic particles embedded in the film‚ offering superior heat rejection and UV protection. It has a reflective‚ mirror-like appearance and is more durable than dyed tint. This type is ideal for drivers seeking advanced solar protection and a sleek look. Metallized tint blocks a significant amount of solar energy‚ reducing interior heat and preventing fading. However‚ it may interfere with radio or GPS signals due to its metallic content. Installation requires precision‚ but its performance and style make it a popular choice for car owners prioritizing functionality and aesthetics.
Ceramic Window Tint
Ceramic window tint is a premium option offering exceptional heat rejection and UV protection without using metal. It provides a clear view and doesn’t interfere with GPS or radio signals; Known for its durability‚ ceramic tint resists fading and scratches‚ ensuring long-lasting performance. It reduces glare and blocks 99% of UV rays‚ protecting passengers from sun damage. Unlike metallized tints‚ ceramic films are non-conductive‚ preventing signal interference. This tint is ideal for drivers seeking advanced protection‚ clarity‚ and style. Its high-quality finish and ability to prevent glass shattering make it a top choice for modern vehicles.

Tools and Materials Needed
Essential tools include a squeegee‚ cutting knife‚ spray bottle with soapy water‚ and a heat gun for shrinking film. Additional materials like lint-free cloths and measuring tape ensure precise application.
Essential Tools for Installation
The installation process requires a squeegee to remove air bubbles and excess water. A cutting knife or precision cutter is needed to trim the tint film accurately. A spray bottle filled with a soapy water solution helps the film adhere smoothly. A heat gun is useful for shrinking the film around curved windows‚ ensuring a tight fit. Additionally‚ a lint-free cloth or paper towels are necessary for drying the window and preventing streaks. Measuring tape ensures the film is cut to the correct size‚ while a credit card can help smooth out small bubbles during application. These tools collectively ensure a professional-grade finish.
Additional Materials Required
Beyond the essential tools‚ additional materials are necessary for a successful installation. A high-quality tint film specifically designed for automotive use is crucial. A soapy water solution‚ mixed with a small amount of dish soap‚ helps the film glide smoothly onto the glass. A plastic applicator card or credit card is useful for pressing out small air bubbles. Masking tape can secure the film in place during application. Paper towels or a lint-free cloth are needed to dry the window and prevent streaks. A trim tool or razor blade is handy for trimming excess film around edges or moldings. Finally‚ a heat gun can be used to shrink the film for a tighter fit on curved windows‚ ensuring proper adhesion and eliminating wrinkles. These materials‚ when used alongside the essential tools‚ ensure a professional-grade installation. Proper preparation and the right supplies are key to achieving a flawless finish. Additionally‚ some installers prefer using pre-cut tint kits tailored to their vehicle’s make and model for precision and ease of application. These kits often include extra materials like adhesive promoters or alignment guides‚ which can enhance the installation process and improve the final result. Always ensure the tint film purchased is compatible with your vehicle’s glass type and complies with local regulations regarding visible light transmission (VLT). Using inferior or non-automotive tint films can lead to poor performance‚ bubbling‚ or peeling over time. Furthermore‚ having a clean‚ dust-free workspace is essential to prevent contaminants from interfering with the installation. This attention to detail ensures the tint adheres properly and maintains its appearance over the years. The right materials and a methodical approach are vital for achieving a professional-looking tint job. In conclusion‚ investing in quality materials and understanding their roles in the installation process is the foundation of a successful car tinting project. Avoid using household cleaners or abrasive products‚ as they can damage the tint or leave residue on the glass. Instead‚ stick to the recommended soapy water solution and avoid touching the adhesive side of the film to prevent oils from your skin interfering with adhesion. Proper handling and storage of the tint film before installation are also important to prevent creases or damage. By gathering all necessary materials and following a systematic approach‚ you can achieve a high-quality tint application that enhances your vehicle’s comfort‚ style‚ and functionality. This comprehensive preparation ensures a smooth and efficient installation process‚ minimizing the risk of errors and ensuring long-lasting results. The combination of the right tools and materials‚ along with careful planning‚ is essential for a successful car tinting experience. Always refer to the manufacturer’s instructions for specific product recommendations and guidelines‚ as different tint films may have unique application requirements. This ensures compatibility and optimal performance‚ guaranteeing that your car’s windows are not only stylish but also functional and durable. In summary‚ the key to a professional car tint installation lies in the careful selection and use of additional materials‚ which complement the essential tools and enhance the overall quality of the finished product.
Installation Process
The installation involves cleaning the window‚ applying the tint with a soapy solution‚ trimming excess film‚ and using a squeegee to remove air bubbles and water.
Step-by-Step Guide to Applying Window Tint
Begin by thoroughly cleaning the window with a glass cleaner. Next‚ measure and cut the tint film slightly larger than the window. Apply a soapy water solution to the window and the film’s adhesive side. Carefully place the film on the window‚ starting from the top. Use a squeegee to press out water and air bubbles‚ working from the center outward. Ensure the film is evenly spread and free of wrinkles. Trim the excess film with a utility knife. Finally‚ inspect for any bubbles or imperfections and address them promptly.
Common Mistakes to Avoid During Installation
Common mistakes during window tint installation include inadequate cleaning of the glass‚ resulting in air bubbles. Incorrect measurement and cutting of the film can lead to poor fitment. Applying the tint without enough soapy water causes uneven adhesion. Using excessive water may trap bubbles‚ while insufficient water makes the film difficult to position. Not smoothing the tint properly can leave wrinkles. Avoid stretching the film‚ as it may tear or distort. Lastly‚ not allowing the tint to cure fully before rolling down windows can cause peeling or bubbling.
Maintenance and Care
Regularly clean tinted windows with mild soap and microfiber to avoid scratches. Avoid using chemical cleaners or high-pressure washes‚ which can damage the film. Let the tint cure completely before exposure to direct sunlight or moisture for optimal durability and appearance.
How to Clean and Maintain Window Tint
To clean and maintain your car’s window tint effectively‚ follow these steps:
Use Mild Soap and Water: Mix a small amount of mild soap with water. Avoid using harsh chemicals or ammonia-based cleaners‚ as they can damage the tint.
Apply with a Microfiber Cloth: Gently wipe the tinted windows using a microfiber cloth. This prevents scratches and ensures a streak-free clean.
Avoid Squeegees and High-Pressure Washes: Squeegees and high-pressure washes can damage the tint or its adhesive‚ so they should be avoided.
Clean in the Shade: Clean your windows in the shade or when they are not too hot to prevent the cleaning solution from evaporating too quickly‚ which can cause streaks.
Dry with a Microfiber Cloth: After cleaning‚ use a microfiber cloth to dry the windows. This helps prevent water spots from forming.
Frequency of Cleaning: Clean your tinted windows regularly‚ considering factors like driving conditions and exposure to elements like rain‚ dust‚ or pollen.
By following these steps‚ you can maintain the appearance and durability of your car’s window tint.

Legal Considerations
Window tint laws vary by location‚ requiring specific light transmission levels. Ensure compliance with local regulations to avoid fines‚ and maintain necessary documentation for verification purposes.
Window Tint Laws and Regulations
Window tint laws vary by location‚ with specific requirements for light transmission and visibility. Ensure compliance with local regulations to avoid penalties. Documentation‚ such as a certified photocopy of the vehicle’s registration and a validation letter from a medical officer‚ may be required. These laws ensure safety and visibility standards are met. Always check local regulations before installing window tint to ensure legal compliance and avoid fines. Proper documentation and adherence to these guidelines are essential for a lawful installation process.
Required Documentation for Tinted Windows
When installing window tint‚ specific documentation may be required to ensure compliance with legal standards. This typically includes a certified photocopy of the vehicle’s registration and the applicant’s identity card. Additionally‚ a validation letter from a government medical officer may be necessary‚ especially for medical exemptions. Proper documentation ensures that the tint installation meets legal and safety requirements. Always verify the specific documents needed in your region to avoid non-compliance issues. These requirements vary by location‚ so checking local regulations is essential before proceeding with tint installation.
Troubleshooting Common Issues
Common issues like bubbles or peeling can arise during or after tint installation. These problems are often due to improper application or environmental factors. Solutions vary‚ but using the right tools and techniques can help resolve these issues effectively. Regular maintenance and inspections are recommended to ensure the tint’s longevity and performance. For detailed fixes‚ refer to the specific troubleshooting section below.
Fixing Bubbles and Imperfections
Bubbles and imperfections in car tint are common issues that can arise during installation. To fix them‚ start by identifying the type of bubble—air or water; Use a heat gun to gently soften the adhesive‚ then employ a credit card or squeegee to push the bubble toward the edge of the window. For stubborn bubbles‚ carefully lift the tint with a razor blade and reapply it. Ensure the surface is clean and dry before reinstallation. Regular inspections and proper maintenance can prevent such issues. Patience and precision are key to achieving a smooth‚ bubble-free finish.
Car tinting is a practical and stylish enhancement for any vehicle. It not only improves privacy and reduces UV exposure but also adds aesthetic appeal. Proper installation and maintenance ensure longevity. Legal compliance is crucial‚ so always check local regulations. With the right tools and techniques‚ car tinting can be a rewarding DIY project or a professional service. Regular care and addressing imperfections promptly will keep your tint looking its best. Whether for functionality or style‚ car tinting is a worthwhile investment for any car owner aiming to enhance their driving experience and protect their vehicle’s interior.